In the context of Salesforce.com, the term round robin frequently comes into play when assigning Lead or Case records to users. For example, you might have five sales reps working new Leads and, as an administrator, you want to divvy out all new Leads equally among the five reps, so if you had a 100 new leads, you would want each rep to get exactly 20 Lead records.
NOTE: This example will be for Leads, but the same concept applies to Case Assignment Rules
A round robin assignment rule allows you to equally distribute new Lead records without having to manually assign them using a rotation as shown below:
- Lead 1 goes to Sales Rep 1
- Lead 2 goes to Sales Rep 2
- Lead 3 goes to Sales Rep 3
- Lead 4 goes to Sales Rep 4
- Lead 5 goes to Sales Rep 5
- Lead 6 goes to Sales Rep 1 (notice the rotation?)
- Lead 7 goes to Sales Rep 2
- Lead 8 goes to Sales Rep 3
- ….and so on
To pull this off in Salesforce you’ll need to create two custom fields on the Lead object. The first is an Auto Number field and the second is a Formula field. You’ll see in a moment how to leverage these two fields to assign Leads.
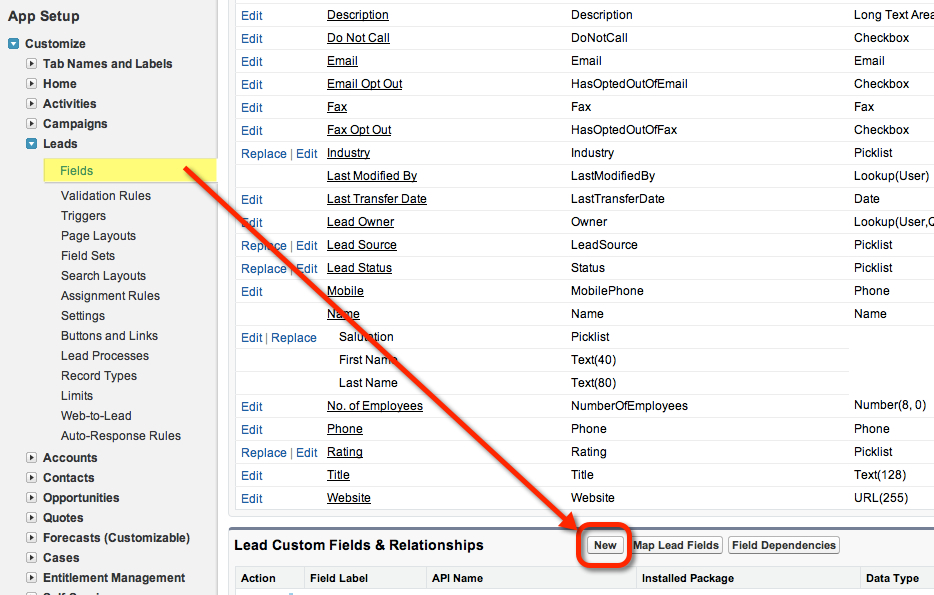
To create our new fields go to Setup > and Type “Leads” > then select Fields
Slide down the page until you see the “New” button where you can create a custom field. Click New.
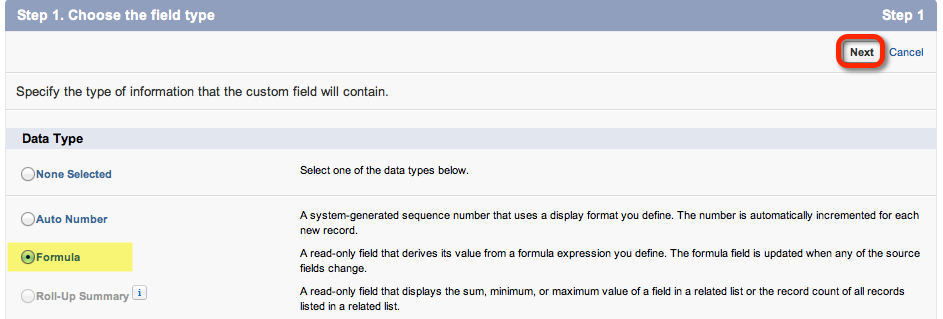
In Step 1 of the custom field wizard, pick the data type “Auto Number”
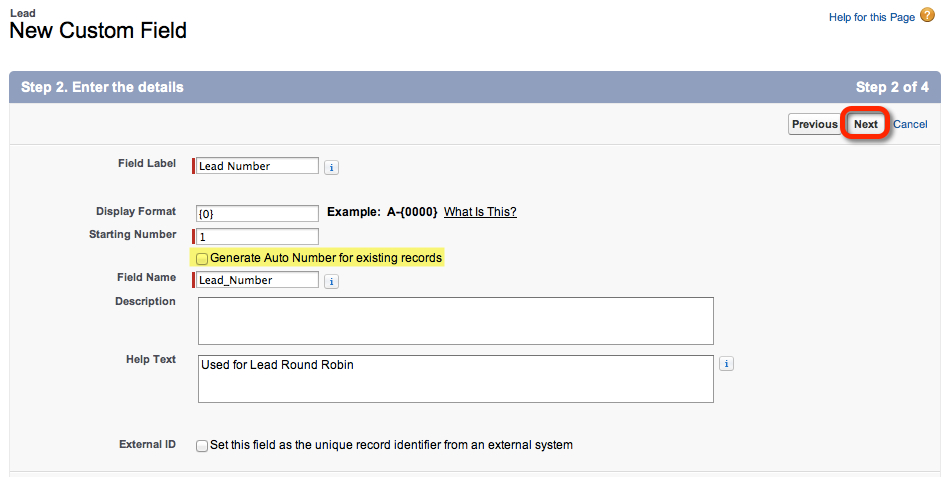
In Step 2
- Field Label: Lead Number
- Display Format: {0}
- Starting Number: 1
- Field Name: Lead_Number
Salesforce assigns a number to this field for each new record created in a sequence (and it’s unique). It cannot be edited by a user. As new records are created the number will increment (i.e. the first Lead is “1″, the next Lead created will get the number “2″, and so on).
Next we are going to create a formula field that will take the number generated by Salesforce and assign it a value in a range you specify in the formula.
In Step 1 of the wizard specify a Formula field.
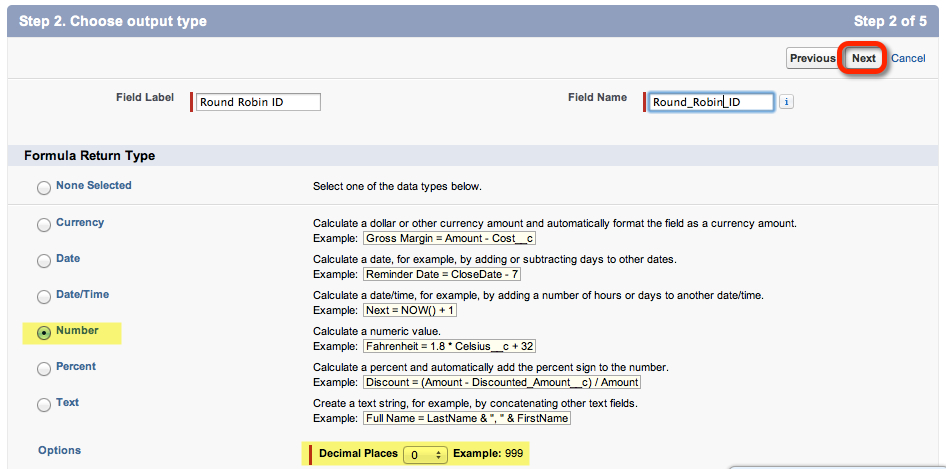
On Step 2 of the wizard
- Field Label: Round Robin ID
- Field Name: Round_Robin_ID
- Formula Return Type: Number
- Options: 0 Decimal Places
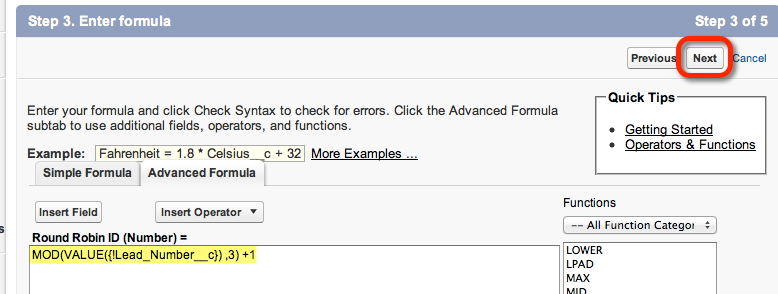
In Step 3 you’ll write a formula with the following value:
MOD(VALUE({!Lead_Number__c}) ,3) +1
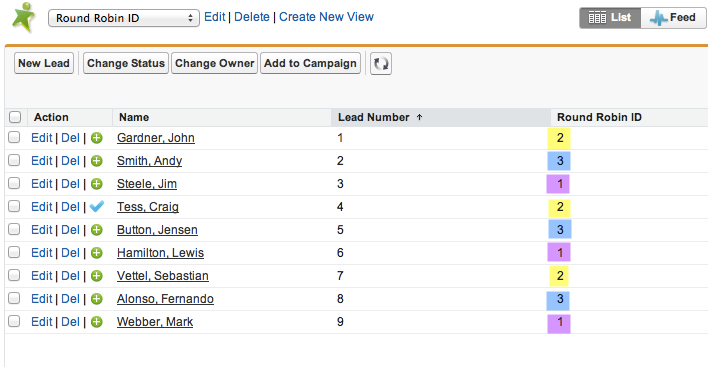
The MOD function is going to take our Lead Number, do a bit of math and return a number in a range we specify. The “3″ in the formula above means that it will return a number of 1, 2, or 3. This quick Lead View shows how the formula is taking our Lead Number field and creating a Round Robin ID.
For example if you change the “3″ in the MOD formula to “5″ you’ll get a result of either 1, 2, 3, 4, or 5 for your Round Robin ID.
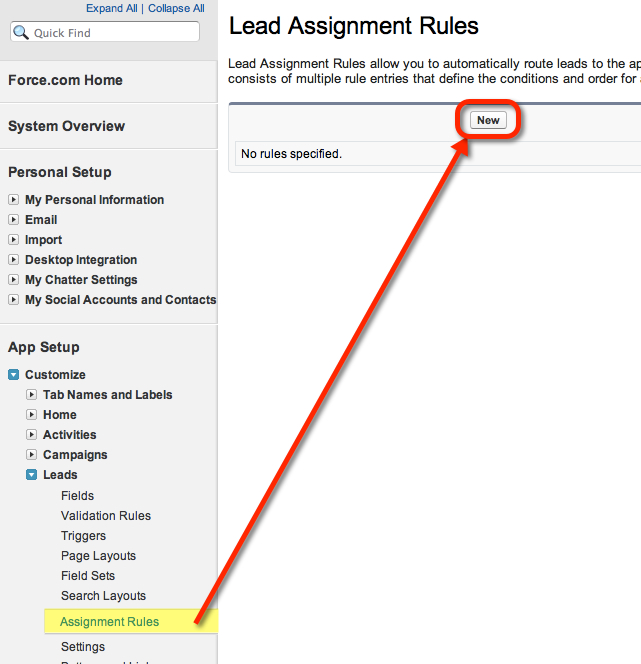
Now that we have a method to tag each Lead with a Round Robin ID (number), we can leverage this in a Lead Assignment Rule by going to Setup > App Setup > Customize > Leads > Lead Assignment Rules, then click the “New” button.
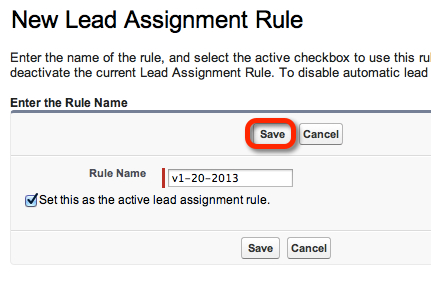
On the next screen give your Lead Assignment Rule a name and click the Active checkbox and click “Save” as in the screenshot below:
On the next screen click on the Rule Name
Then click the “New” button to start entering rules.
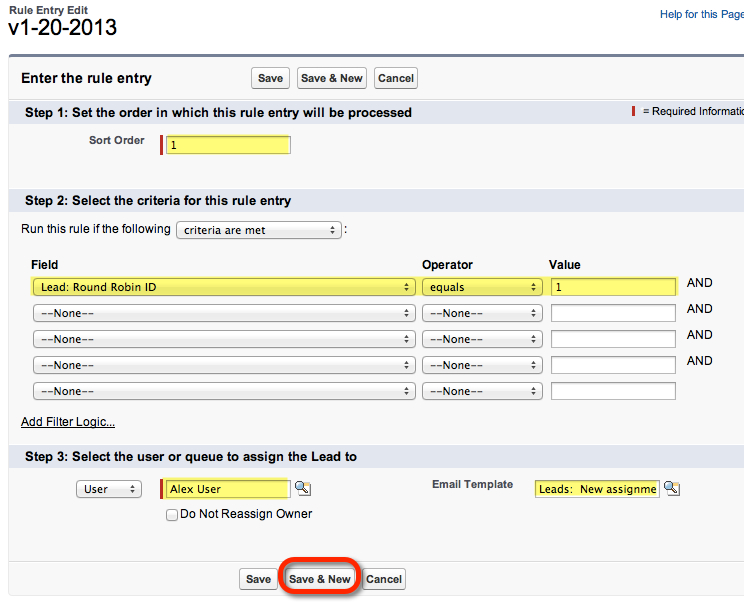
Step 1:
- Sort Order: 1
Step 2:
- Field: Lead: Round Robin ID
- Operator: equals
- Value: 1
Step 3:
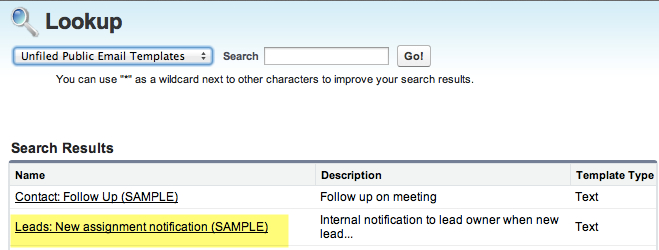
Select the User to be assigned the Lead and (optionally) select an email template to notify the new owner they have just been assigned a Lead. There is an “out of the box” email template called “Leads: New assignment notification (SAMPLE)” that comes with Salesforce that is usually stored in the “Unfiled Public Email Templates” folder.
How does Sort Order come into play?
When you have a set of assignment rules, Salesforce evaluates the rule in the order you specify (i.e. the Sort Order). Salesforce checks the Lead record against the first rule (Sort Order 1), and if the criteria is a match, Salesforce reassigns the Lead to the new Owner.
If the Lead record being evaluated does not match the first rule, the Lead assignment rule checks the next rule in the sort order and continues until the criteria makes a match. We’ll expand on how to construct and best practices on Assignment Rules in a later blog post.
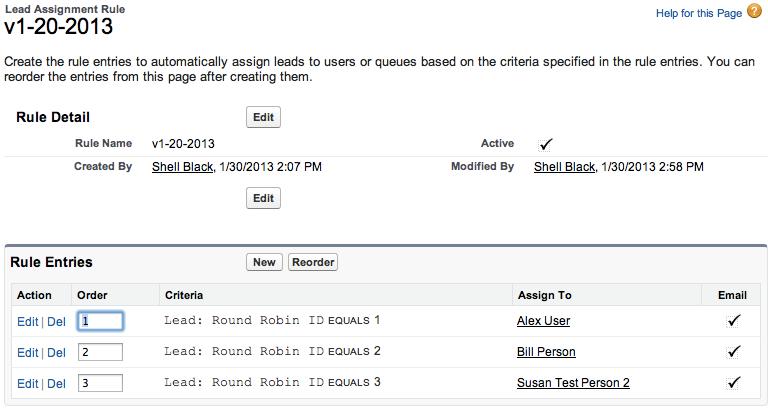
When you are finished, you’ll have a rule for each person that you want assigned a lead
TIP: If you want one person to get a certain percentage of Leads, let’s say 60%, you could change your MOD formula to give you ten results. Then on your assignment rule your rule would look something like this:
That’s it!
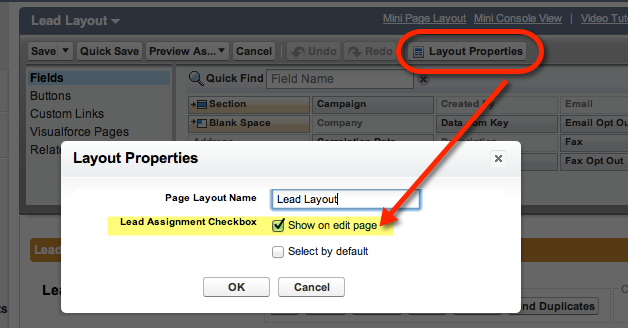
If you want to manually test your rule, make sure your page layout has the checkbox “Assign using active assignment rules” displayed. If not, add it to your page layout:
Check that box and save the Lead record. Viola! Your lead should be reassigned based on the rules you have in place.

