Follow the below steps to create an app in salesforce Lightning
- From Setup, enter App Builder in the Quick Find box, then select Lightning App Builder.
- Click New.
- Select App Page, and then click Next.
- Name your Lightning page (Ex:My App).
- Select the Two Columns template and click Finish.
- If the Lightning App Builder walkthrough pops up, dismiss it.
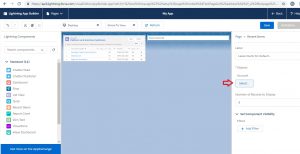
- Drag the List View component into the first region.
- In the properties pane, under Filter, select the Platinum and Gold SLA Customers view.
- Add a Recent Items component into the second region.
- In the properties pane for the Recent Items component, click Select and add the Opportunity object to it.
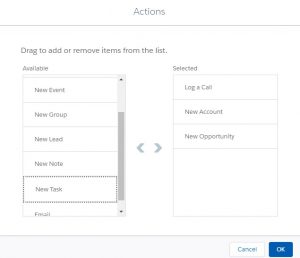
11.In the properties pane, click Page, click Select, and then add these actions to the page.
Log a Call
New Account
New Opportunity
You can add only global actions to a Lightning page.
- From the toolbar, change the view to Tablet-Landscape.
Click Save, and then Not Yet.
Add Your App Page to Lightning Experience and the Salesforce Mobile App
Just like the other pages, your users can’t access your app page until you activate it. During activation, you can customize the page’s custom tab label, adjust its visibility, and set its position in the Salesforce mobile app navigation list and Lightning Experience app navigation bars, all in one place.
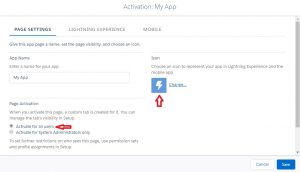
- Click Activation.
- Don’t change the app name.
By default, the label that you give the Lightning page is used as the label for its custom tab.
3.Change the icon to the blue lightning bolt icon.
The icon that you choose here is used as the icon for the mobile app and for the page in Lightning Experience.
4.Keep the tab’s visibility open to all users.
The Activate for the System Administrator profile only setting is useful while you’re working on your Lightning page. Restricting your page to administrators only means that you can see and test the page, but your users can’t see it until you’re ready to expose it to them.
5.Click the Lightning Experience tab.
6.Select a Lightning app, and click Add page to app.
The page you’re adding to the menu appears in the second position by default. Let’s leave it there. If you put it into the top position, it becomes the landing page for all your Lightning Experience users.
7.Click the Mobile tab.
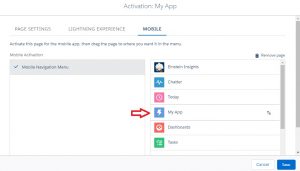
8.Select Mobile Navigation Menu, and click Add page to app.
9.By default, new pages you add to the Salesforce mobile app menu appear below the Smart Search Items menu item. If you leave the “My App” there, it will appear in the Apps section of the menu. We don’t want that, so let’s move it up.
10.Drag the page to below the Today menu item.
11.Click Save.
Your app home page is now ready for your mobile and Lightning Experience users!


