How to Send a Custom Notification using Flow
Details :-
Using Salesforce Custom Notifications, organizations can enhance communication with their users and employees, delivering personalized, real-time messages through multiple channels like email and in-app notifications. This powerful tool not only engages users more effectively but also automates important announcements, updates, or reminders. With tracking and integration capabilities, organizations can ensure consistent and secure communication while improving user experience and overall productivity within the Salesforce ecosystem.
Create a Custom Notification :-
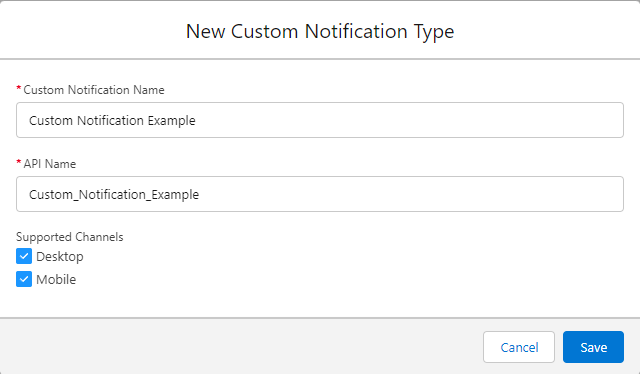
- Before you can send a custom notification, you need to define a custom notification type. This is done in Salesforce Setup.
- Go to Setup by clicking on the gear icon in the upper right corner.
- In the Quick Find box, type “Custom Notifications” and select “Custom Notification Types.”
- Click “New Custom Notification Type” and enter Custom Notification Name and Api Name.
- Select Supported Channel, Desktop and Mobile.
- Click Save.
Configure the Delivery Setting :-
Go to Setup by clicking on the gear icon in the upper right corner.
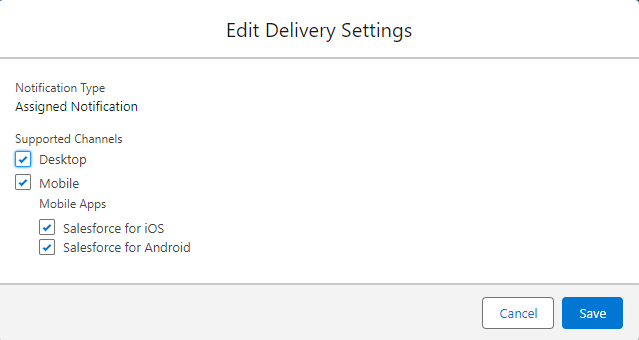
- In the Quick Find box, type “Notification Delivery Setting” and Find “Custom Notification Types.”
- Find your Notification Name and click Edit in the Dropdown button.
- Select Salesforce IOS and Salesforce for Android under Mobile Apps.
- Click Save.
Create a Flow :-
- In Salesforce, go to Setup.
- In the Quick Find box, type “Flow” and select “Flows.”
- Click “New Flow” to create a new flow.
Design Your Flow :-
- Create Any type of Flow you want.
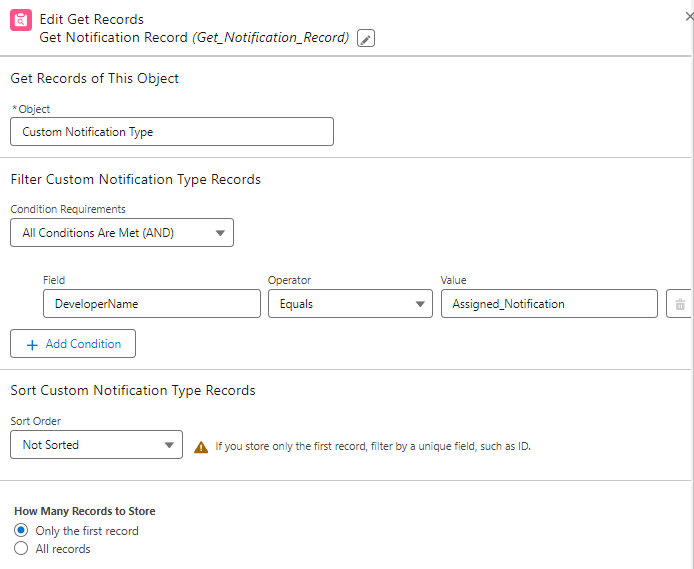
- Firstly, Select the Get Records Element and Configure based on the below Image.
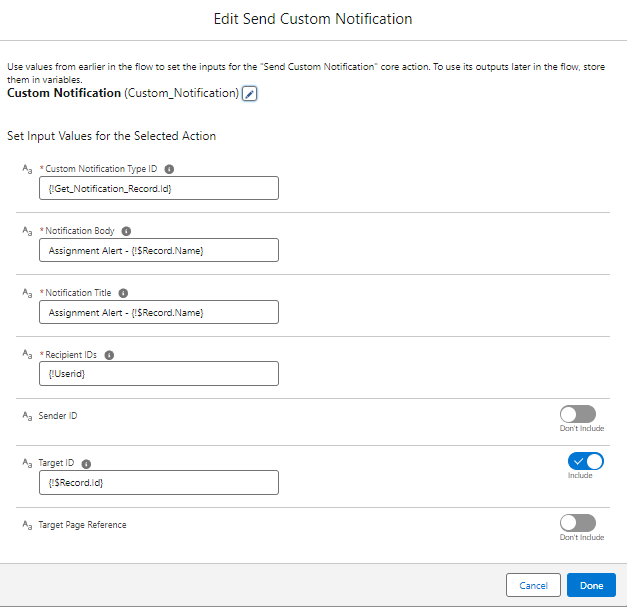
- After that, Select the Action Element Action Type Send Custom Notification and Configure based on the below image.
- Finally, debug your flow and a Activate the flow.
Get Records Configuration :
Action Element Configuration :


