Formula Field :
You can create custom formula fields on any standard or custom object. To start, we’ll create a formula on the Opportunity object. Follow these steps to navigate to the formula editor.
- From Setup, open the Object Manager and click Opportunity.
- In the left sidebar, click Fields & Relationships.
- Click New.
- Select Formula and click Next.
- In Field Label, type My Formula Field. Notice that Field Name populates automatically.
- Select the type of data you expect your formula to return. For example, if you want to write a formula that calculates the commission a salesperson receives on a sale, you select Currency. For now, pick Text.
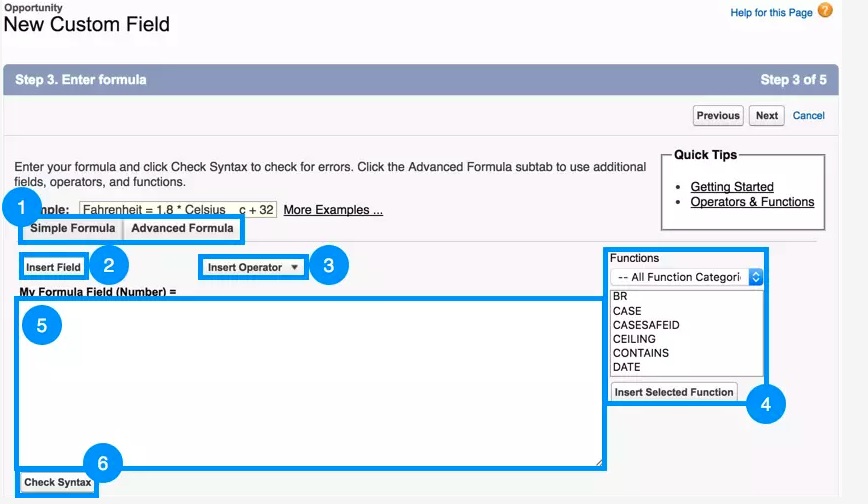
- Click Next. You’ve arrived at the formula editor! Time for our tour
The formula editor comes in two flavors: Simple and Advanced. It’s tempting to use the Simple editor, but we always recommend using the Advanced editor. Advanced doesn’t mean more complicated. It means more tools for you to create powerful formulas.
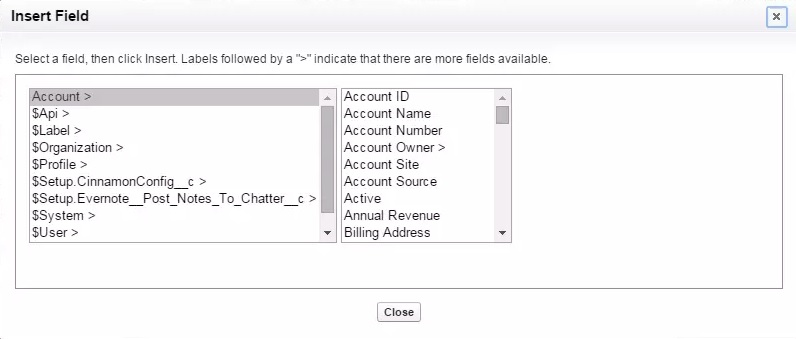
The Insert Field button opens a menu that allows you to select fields to use in your formula. Inserting from this menu automatically generates the correct syntax for accessing fields.
The Insert Operator button opens a drop-down list of the available mathematical and logical operators.
The Functions menu is where you view and insert formula functions. Functions are more complicated operations that are pre-implemented by Salesforce. Some functions can be used as-is (for example, the TODAY() function returns the current date), while others require extra pieces of information, called parameters. The LEN(text) function, for instance, finds the length of the text you input as a parameter. The formula LEN(“Hello”) returns a value of 5.
The text area is where you enter your formula. When writing formulas, keep in mind that:
- Whitespace doesn’t matter. You can insert as many spaces and line breaks as you want without affecting the formula’s execution.
- Formulas are case sensitive. Pay attention to capitalization of field and object names.
- When working with numbers, the standard order of operations applies.
Once you’ve written a formula, you can use the Check Syntax button to ensure that everything is in working order before saving. If your formula has issues, the syntax checker alerts you to specific problems.
Map Lead Fields :
Select Setup in the top right corner
Click Object Manager and select Lead from the object list
Click Fields & Relationships in the left panel
Select Map Lead Fields in the right corner
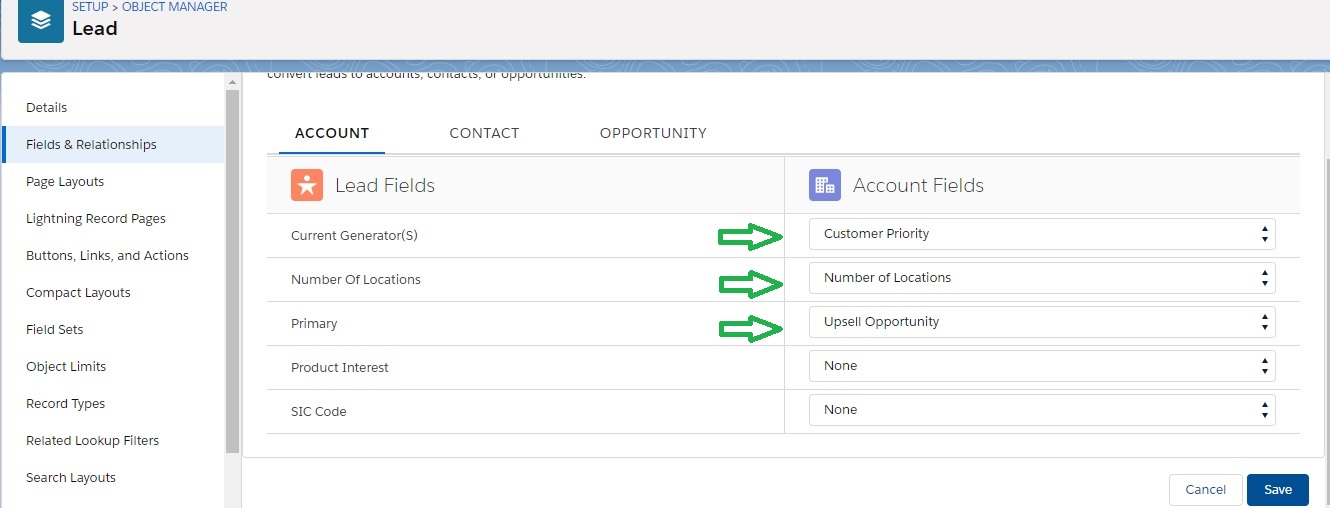
Map fields screen will appear. Use the tabs to map each of your organization’s custom lead fields to one of your custom account, contact, or opportunity fields. These mappings are used when you convert leads to accounts, contacts, or opportunities.
Click Save.
This training blog will be very helpful to learn about use of formula field and Map fields.


